How to Clean Your Hydration Bladder?

If you are a professional athlete, you run every day. Marathon training requires patience and consistency. To build endurance, you are to run not less than 4-5 times a week. It lets you become stronger and faster. Running enthusiasts may resume training in March: spring is a very good time to resume training. Now, you are to check your run gear. How to clean hydration bladder?
After a long, cool and wet winter, make moves. Firstly, unpack your mid-weight clothes and appraise their condition. Secondly, look at your hydration bladder. If have problems with it, then you’ll have to renew it or buy a new, more advanced and handy product. Initial cleaning is essential anyway. It lets you get clean, fresh, bacteria-free water every time you need it. How to do it properly? Let’s get into details. Initial cleaning is essential anyway. It lets you get clean, fresh, bacteria-free water every time you need it. How to do it properly? Let’s get into details.
How Often Should I Clean My Water Bladder?
Are you anticipating getting back to summer adventures? It gets warm soon. So, you might renew hiking, cycling and running in spring. In Oregon, it still feels like winter. Sunbreaks and sunny weather is quite rare here. Cold storms and snowfalls may impair your early morning running experience.
Light snow accumulation up to 1 inch is possible in March. Thus, don’t forget to check weather and road conditions beforehand. When it gets a bit warmer, resume running or hiking. Unpack your best kids hydration pack. It should come with a suitable water bladder, that is:
- flexible;
- soft-sided;
- easy to drink;
- convenient to carry;
- properly sized.
It lets your kid sip water on the go. During a short walk and in cool weather conditions, hydration is still essential. Your child has to get plain, contaminants-free water. Therefore, you are to clean the bladder every time, after and before use. It is time-consuming? Let’s discuss how to deal with it faster and easier.
Which Hydration Bladder is Easier to Maintain?
Running in spring is healthy and rejoicing. Clothing and running gear is vital. In March, you might need to wear a long-sleeved shirt or rain jacket. Natural, soft socks and comfortable trail shoes are a must.
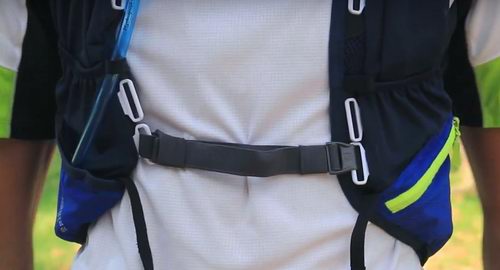
A vest or pack with a handy hydration bladder is also essential. It is to be easy to sip water and clean. Some structural parts enable it. Let me set a grip of examples.
The best hydration pack for skiing commonly comes with proper insulation. It protects water from freezing, letting it flow fast. In spring, after snow melting, you can skip this feature. Puddles don’t impair your running performance.
According to a recent study, cool air temperatures are beneficial. It eliminated risk of hypothermia. Percentage of marathon runner’s withdrawals is lower in spring. It lets you get maximum speed or exercise easier.
How Do You Clean and Dry a Hydration Bladder?
Regardless of the reservoir type and size, you are to clean it properly. It lets you keep your drinking water fresh, eliminating bacterial growth. You are to:
- Sanitize it.
- Soak it in a sterilization solution.
- Scrub its inside surface.
- Rinse with water.
- Hand the bladder to let it dry.
Sanitizing is especially important, as it goes about your health. It’s necessary to keep harmful bacteria and microbes from growing. How do you get rid of mold in your bladder? If you’ve left the reservoir wet for some days or weeks, it may happen. In this case, you’ll need to use bleach or special sterilization tablets.
After soaking, long-time, exhausting scrubbing is necessary. You’ll need a cleaning brush and scrubbing pad. Meanwhile, design and structure of your bladder matter. Zip-top, fold-top and slide-top items are beneficial. They are reversible and dishwasher-safe. Slide-top bladders are faster to open: it ensures intuitive cleaning and drying. Additionally, reservoirs of this type are completely leak-proof and reliable.
Hydration Bladder No Plastic Taste
A new reservoir might have a slight smell and taste of plastic. Cheap, low-end products can feature strong original odor. It depends on the material. Modern copolymers, like TPU or EVA, are soft, flexible and perfectly durable. Additionally, they are more hygienic and cold-resistant than other materials.
All top-quality products are BPA-free and hypoallergenic nowadays. Reservoirs that feature antimicrobial coating are preferable. HydroGuard technology by CamelBak is a good example. Inner surface of these reservoirs and tubes contains a special, EVA-registered compound.
Antimicrobial properties of the reagent keep bacteria from growing. They are not able to cause nasty odors and water discoloration. Your water always remains fresh, without plastic taste. Nevertheless, you are to clean your bladder every time, after or before use.
Are you fixing to clean hydration bladder before first use? I would still use natural solutions that include:
- hot or boiling water;
- baking soda;
- lemon juice;
- vinegar.
They act as sanitizers and deodorizers. Denture cleaning tablets are useful, and they are safe and non-toxic. Bleach is an efficient cleaning substance. But it’s toxic, so I would use it as a last resort.
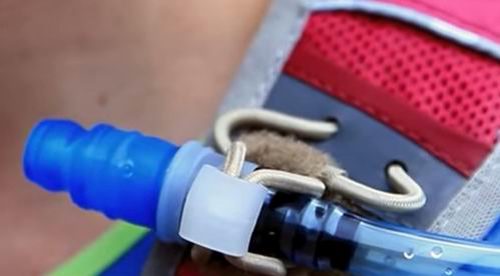
How Do You Clean a Hydration Bladder Tube?
Reversible reservoirs are easier to maintain. Unlike screw-cap items, they don’t have hard-to-reach corners. But some cleaning difficulties may still arise. Drinking tubes and bite valves might be tricky to scrub. You’ll need special stuff, like:
- tube cleaner brush;
- knotted cord;
- a piece of wire and cloth;
- special cleaning tool.
How can you scrub a thin and long drinking tube? Procedure is necessary to get rid of residue or stubborn build-up. Quite naturally, you can use a homemade cleaning tool. Take a long piece of wire. After that, cover it with a clean piece of paper or cloth. Is it efficient? If you doubt, buy a bladder cleaning set that includes a fitting knotted cord.
Thus, you are to scrub inner surface of the tube. Rinse it with hot soapy water or a cleaning solution you prefer. Don’t forget about the bite valve, bladder mouth and cap. Even the tiniest dust cover and closures require scrubbing and soaking. So, rinse all bladder parts with clean water properly and let them air dry.
Bottom Line
Cleaning your hydration bladder is a tricky, but essential task. Do it every time you use it. After a seasonal break, cleaning is especially necessary. Keep your useful gear dry. Hang it, enabling free airflow. Fortunately, most top-quality hydration reservoirs come with detachable tubes. So, you can easily separate it for better drying. Therefore, use a hanger or a horizontal bar. Tube clips might be helpful. Avoid areas with high humidity, like bathrooms. Store your hydration bladder properly. It enables, healthy odor-free application.